How to create and agree a contra
This guide covers the first half of a contra: choosing the documents, sending the statement and recording the counterparty's agreement. Nothing is written to Xero during these steps. New to contras? Start with Contras in Xero: how it works.
1. Start a contra
- Go to Payments, then Contras.
- On the Counterparties tab, find the counterparty and currency. Each row shows We owe them, They owe us and an Indicative net.
- Select Start contra.
The indicative net counts open bills and invoices only. Credit notes are read from Xero when you start the contra, so the net can change once you are in it.
2. Choose the documents
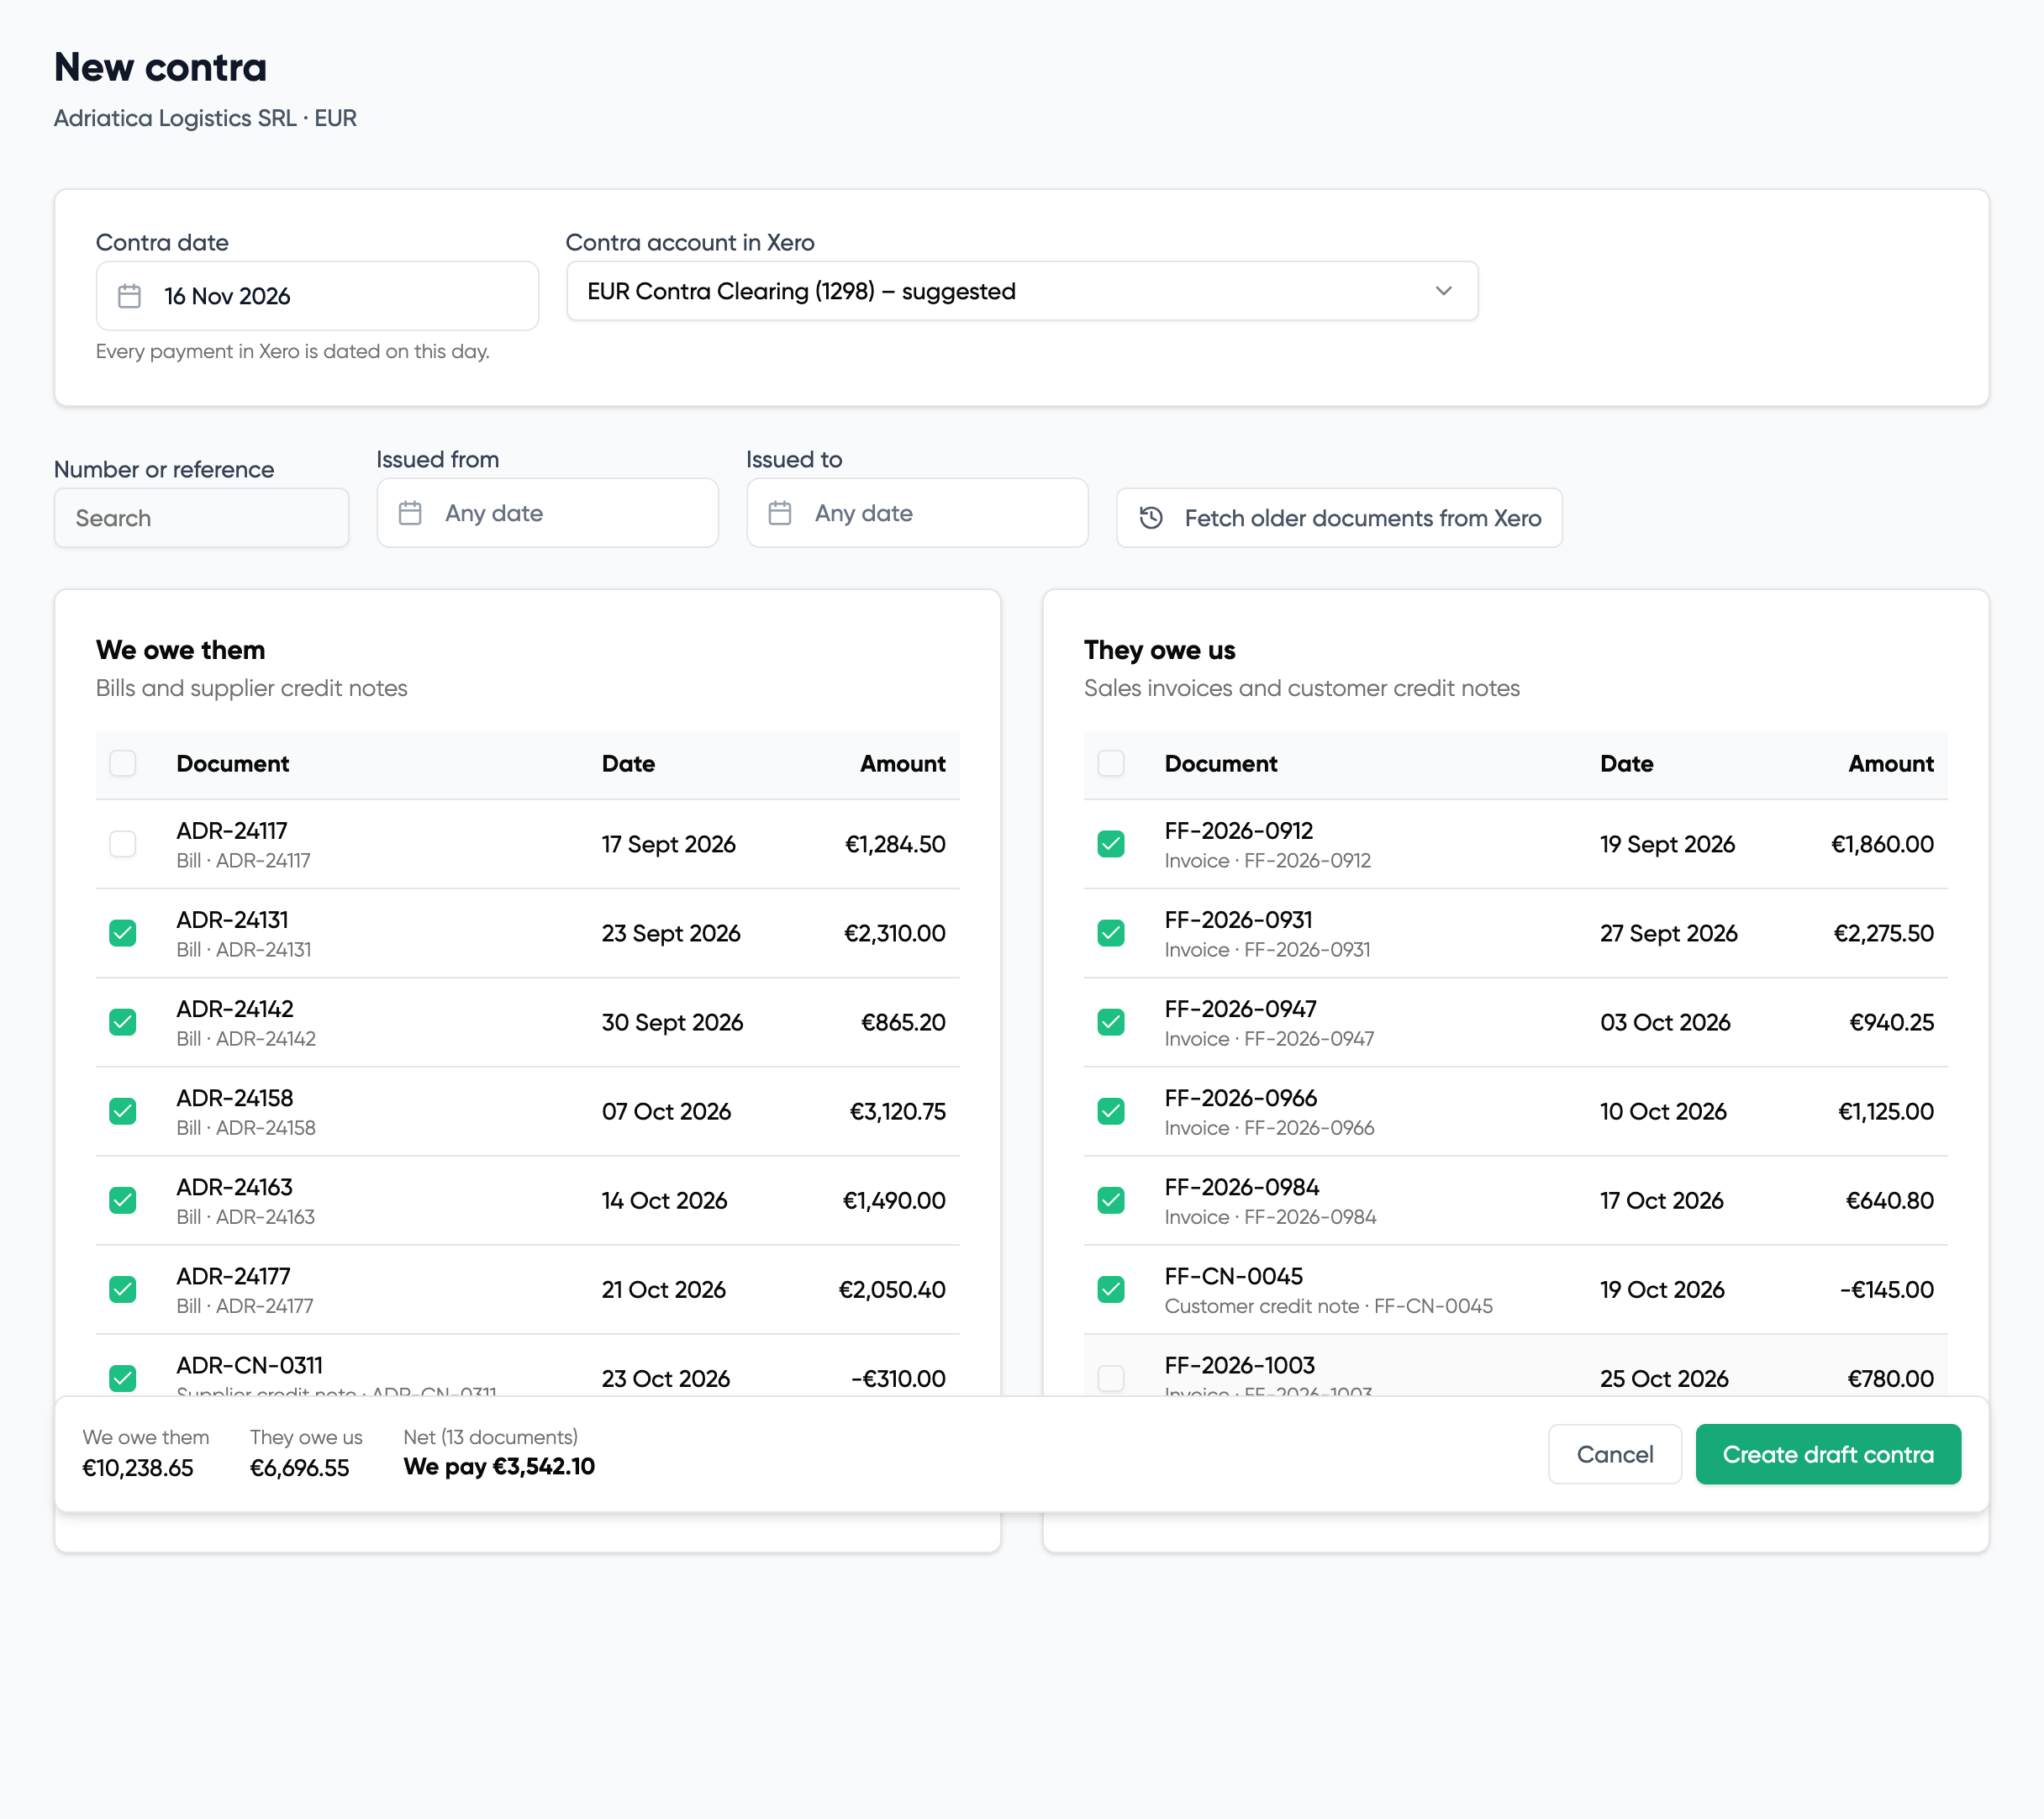
The contra opens with two lists: We owe them (bills and supplier credit notes) and They owe us (sales invoices and customer credit notes). Credit notes appear as negative amounts on their own side.
- Tick each document to include, or use the box in the header to tick a whole side.
- Filter by number or reference, or by issue date, to find documents quickly.
- If an older document is missing, select Fetch older documents from Xero.
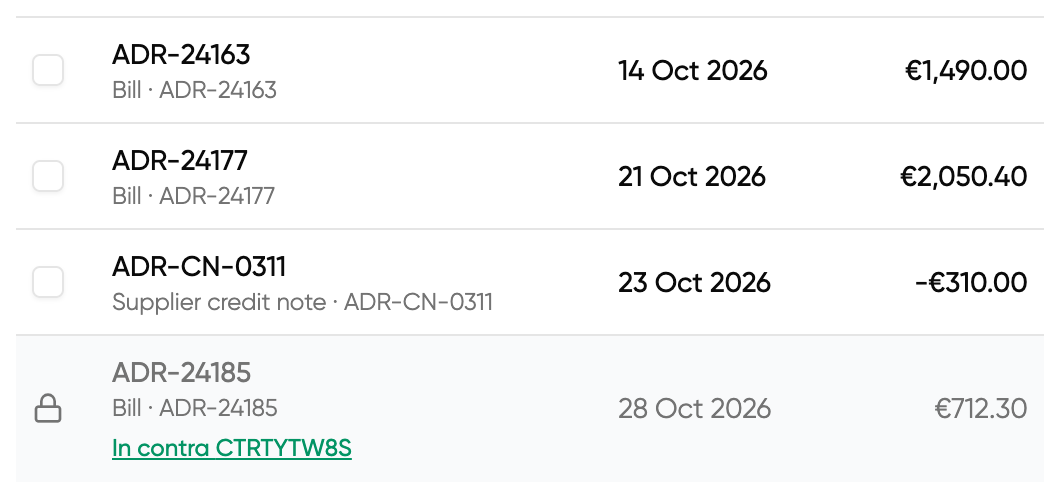
- A padlock means the document is already in another open contra. Follow the In contra link to see which one.
The bar at the bottom shows both totals and the net as you tick: We pay, We receive or Nothing to settle.
3. Set the contra date and account
- Contra date. Every payment in Xero is dated on this day. It defaults to today.
- Contra account in Xero. The bank-type account the contra posts to. HedgeFlows suggests an existing contra or clearing account in the currency and remembers your choice for next time. If no suitable account exists, select Create HedgeFlows Contra and one is added to Xero.
Select Create draft contra. The contra is saved as a draft and its documents are locked to it.
4. Flag anything in dispute
If the counterparty queries a document, you don't have to hold up the rest.
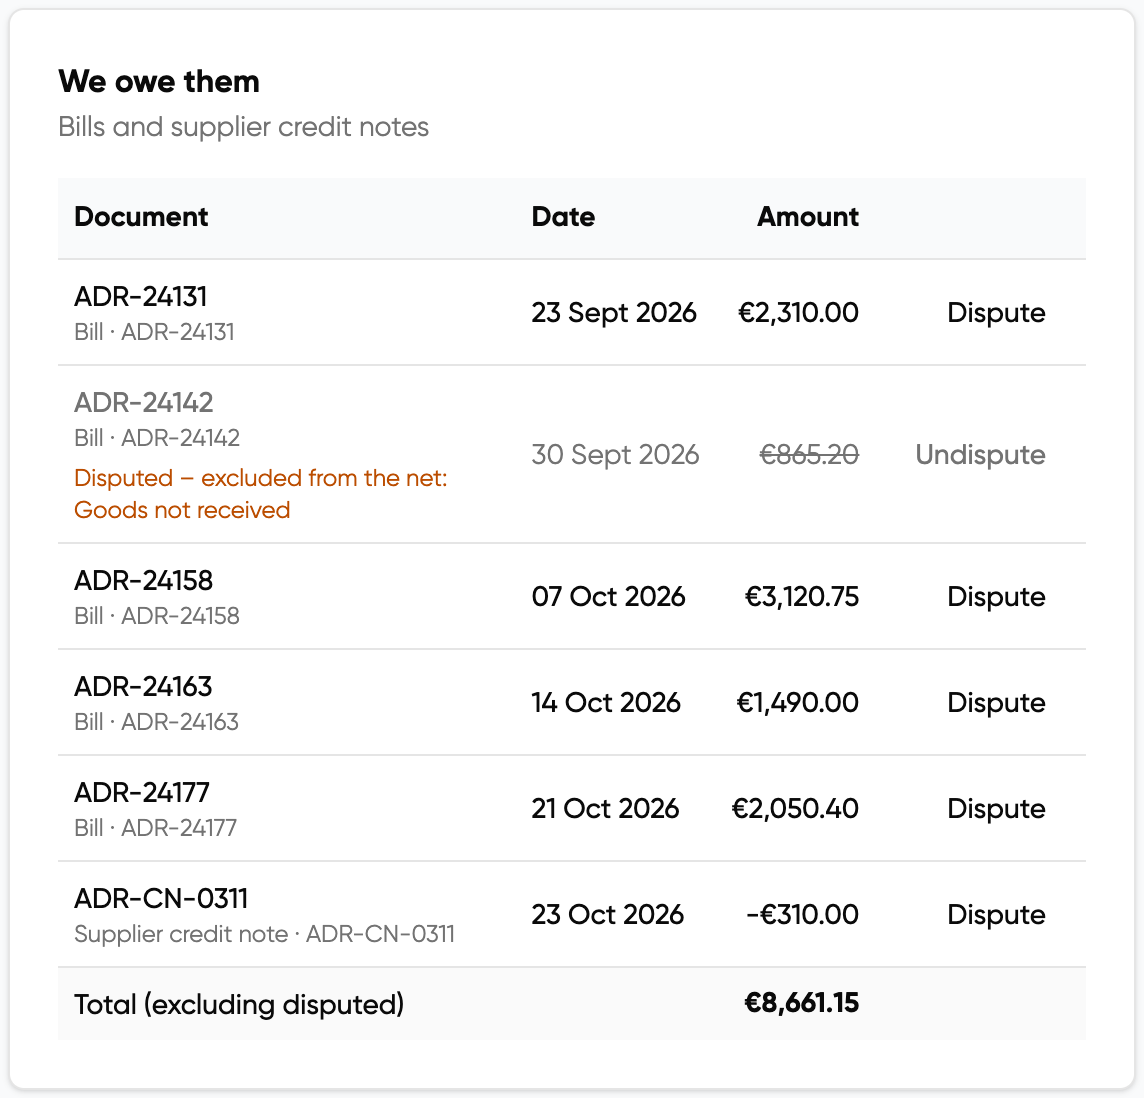
- On the contra, select Dispute next to the document.
- Enter the reason. It is shown on the statement.
- Select Mark as disputed.
A disputed document stays listed on the contra but is left out of the net, shown on the statement as excluded, and never marked paid in Xero. It stays open and can go into a later contra once it is resolved. Select Undispute to bring it back in. Disputes can be changed until the contra is agreed.
5. Generate and send the statement
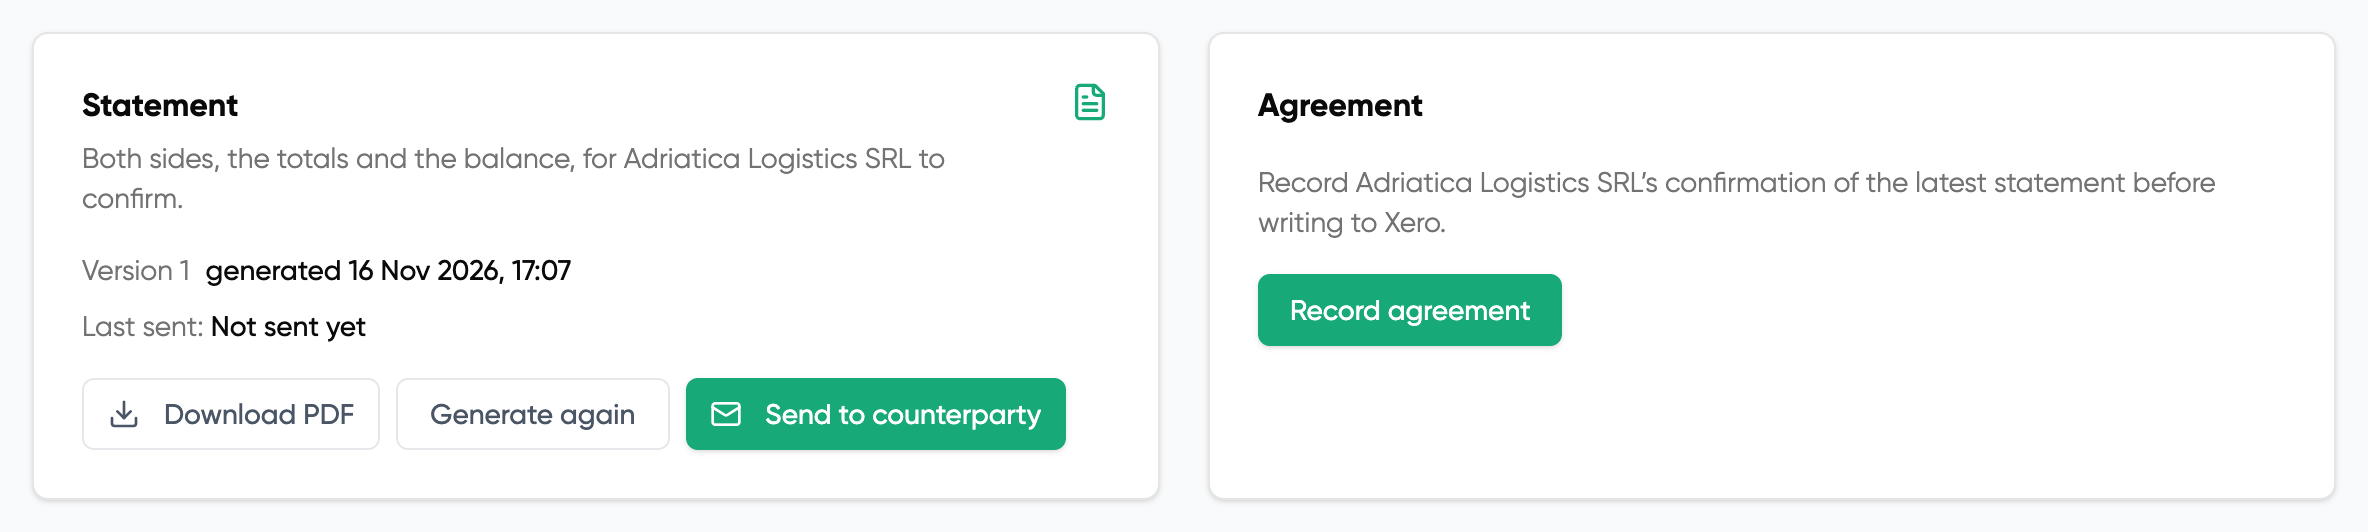
The statement is a PDF listing both sides, the totals, any excluded documents and the balance payable, with a request to confirm by reply.
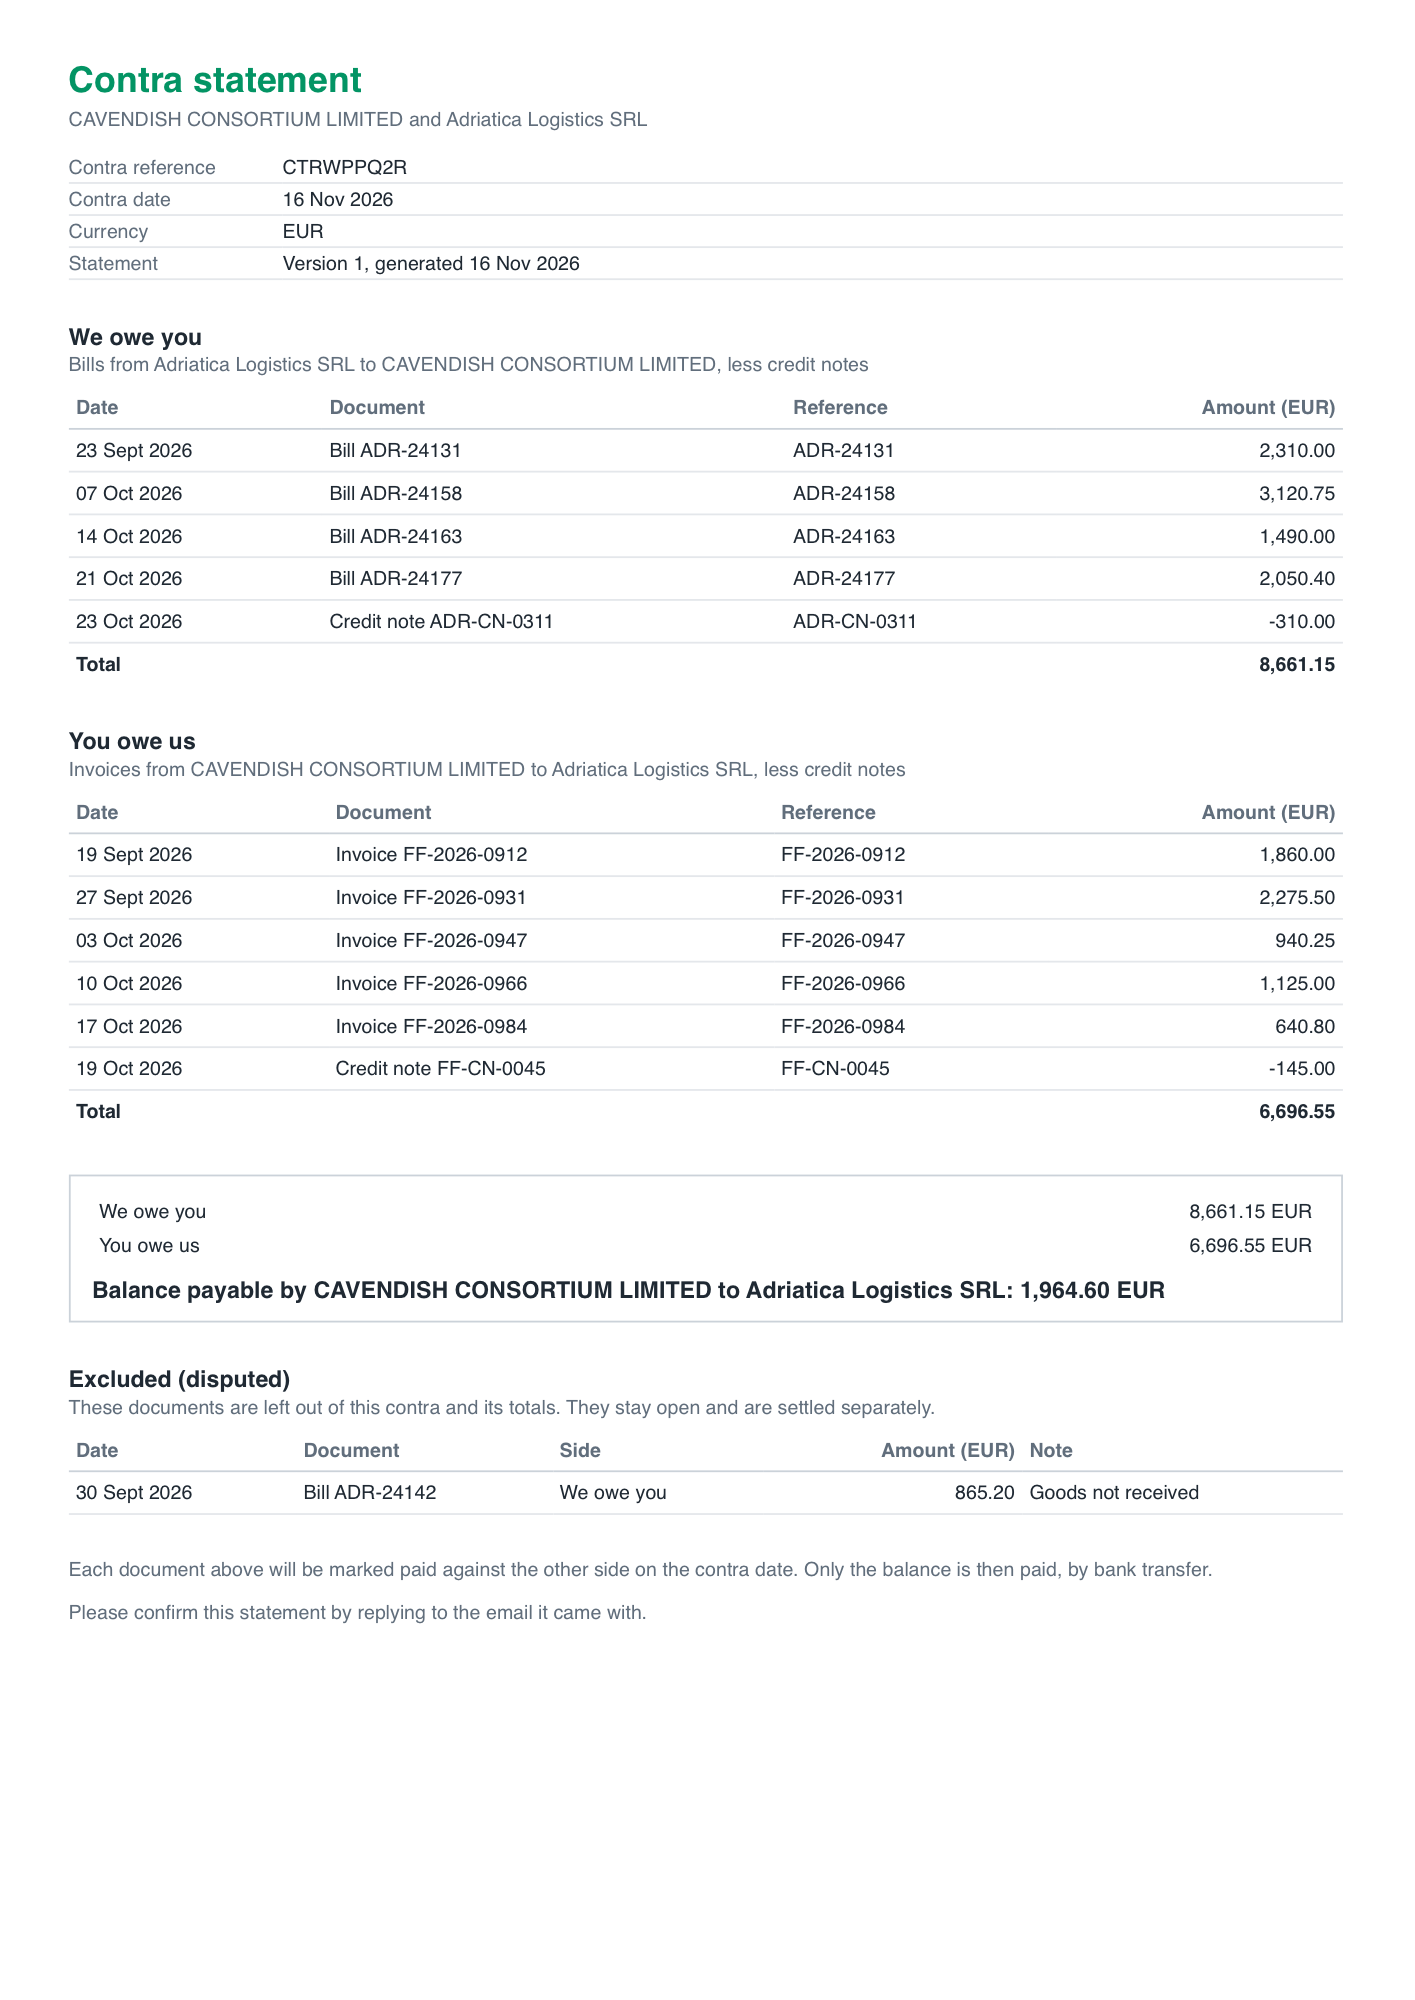
- In the Statement panel, select Generate statement, then Download PDF to check it.
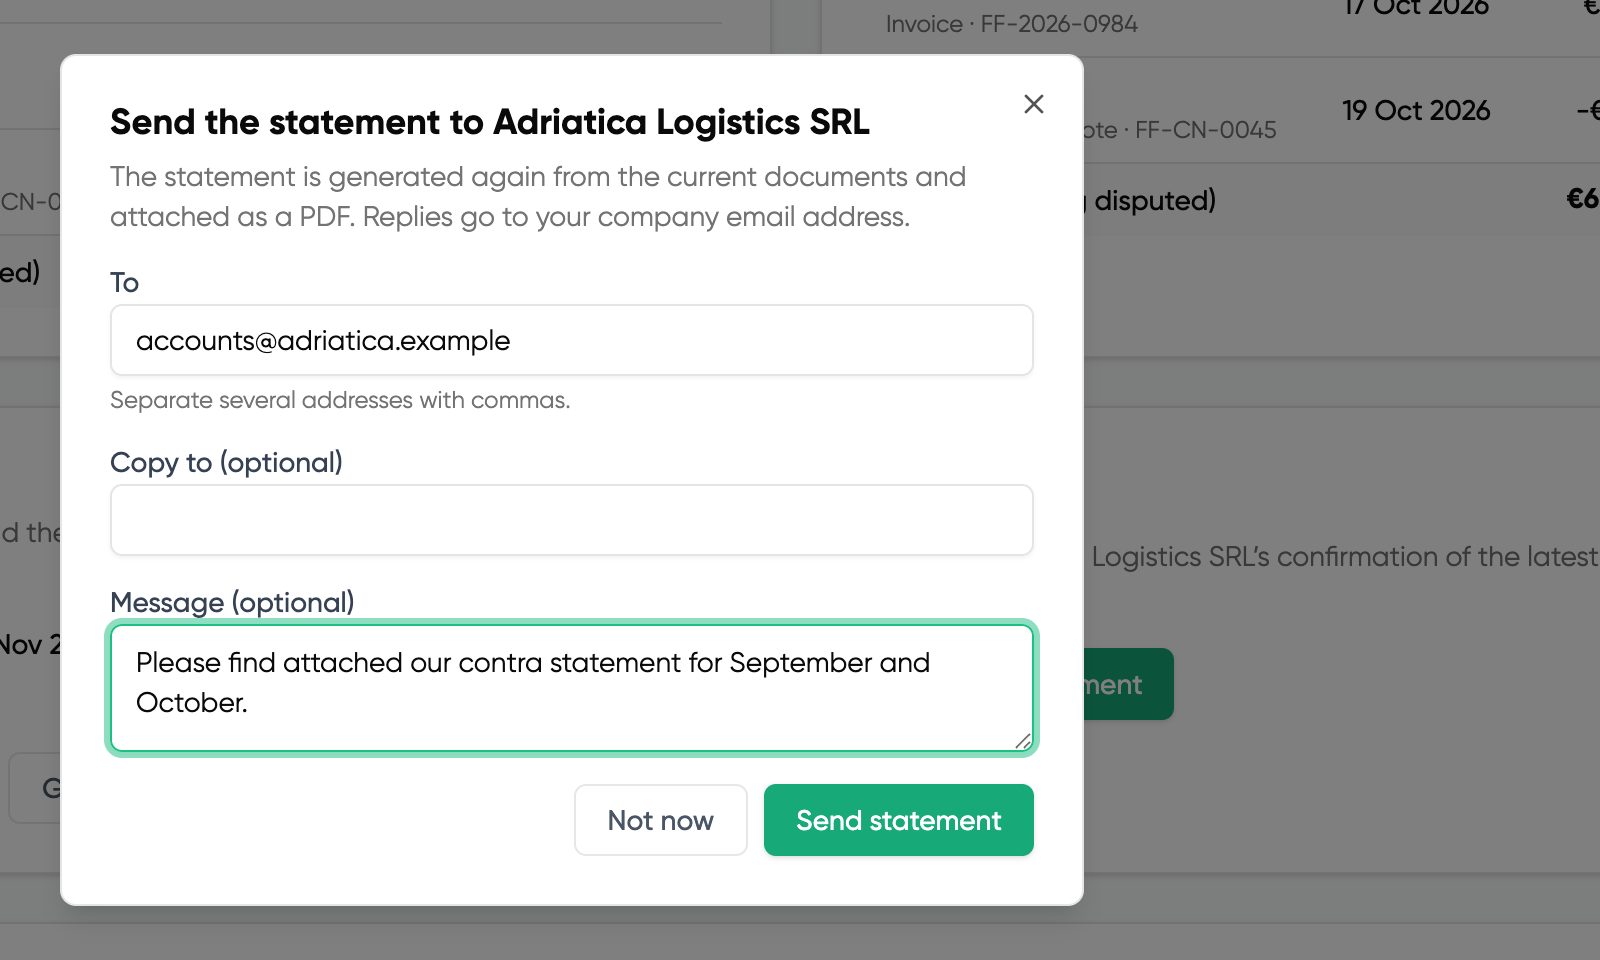
- Select Send to counterparty.
- Check the To address, which is filled in from the Xero contact. Add a copy address and a message if you want.
- Select Send statement. Replies go to your company email address.
The contra moves to Statement sent. If you change the documents afterwards, generate the statement again before sending it or recording agreement. Each new version is numbered.
6. Record the agreement
- When the counterparty confirms, select Record agreement.
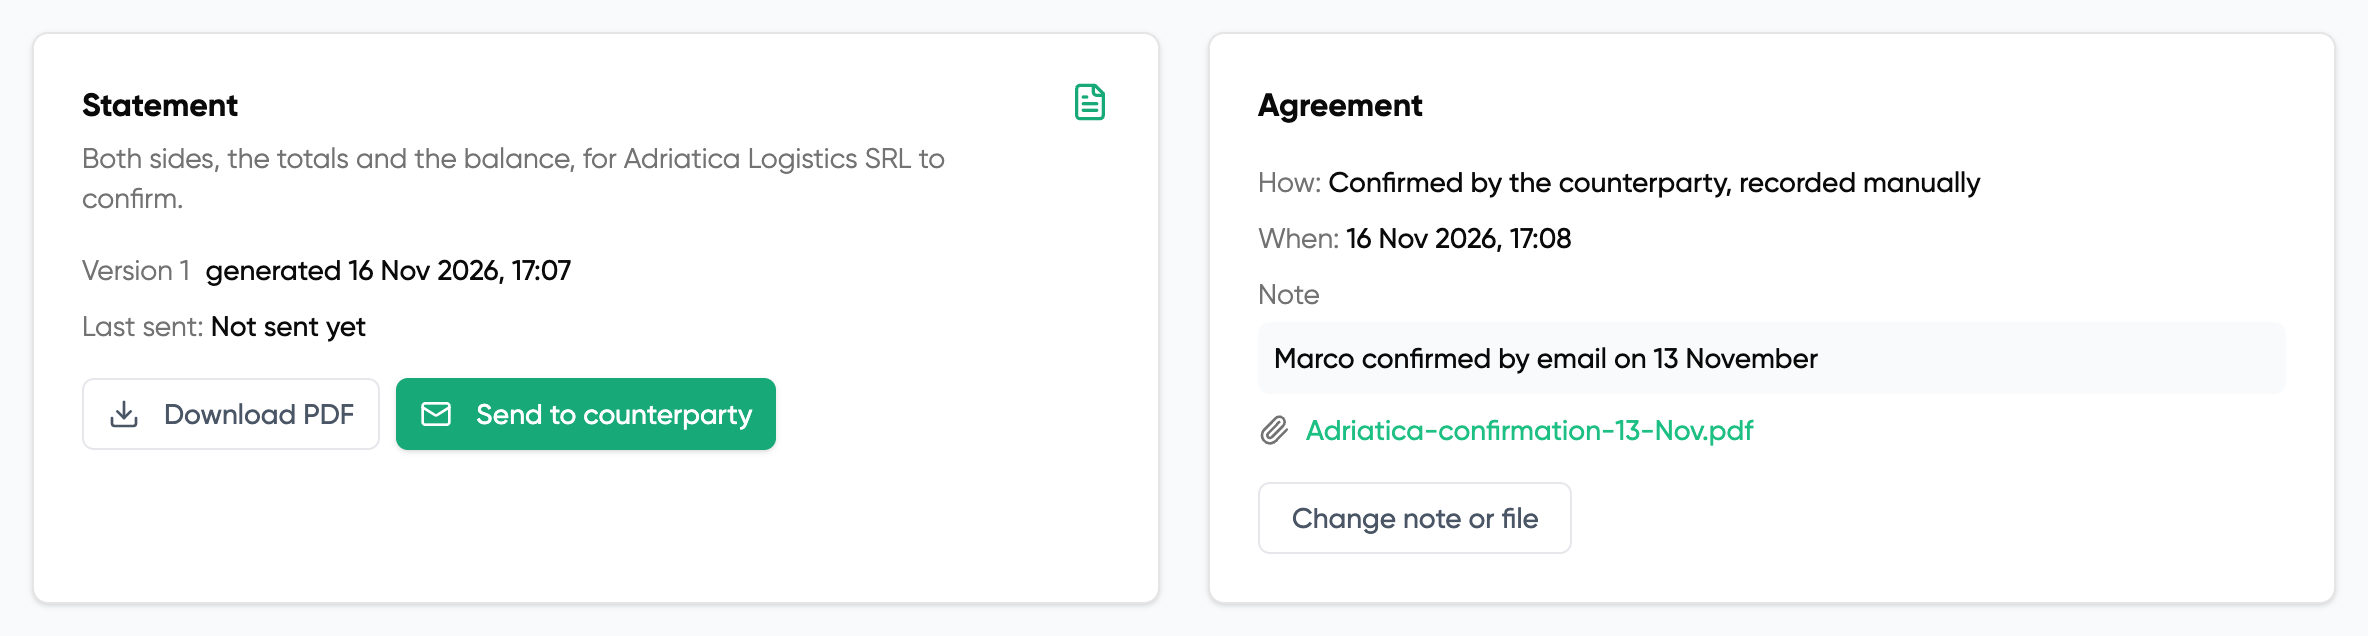
- Optionally add a note and attach their confirming email or their own statement (up to 10 MB).
- Select Record agreement.
The contra moves to Agreed. The net is now fixed and the documents can no longer change, though you can still change the contra date and account. You can add or replace the note and file later with Change note or file.
If your company has Skip counterparty agreement switched on in the Contras settings, you can write to Xero without recording agreement first. The statement is still generated and the agreement is logged as skipped.
Changing or cancelling a contra
- Select Edit documents, date or account to add or remove documents while the contra is a draft or its statement has been sent.
- Select Cancel contra at any point before it is written to Xero. Cancelling frees every document so it can be used in another contra. It cannot be undone.
Next
How to write a contra to Xero and settle the net.
Questions? Email support@hedgeflows.com.